Ableton
Sending and Receiving MIDI with Ableton and Nexus
This is a first draft of a guide to getting Ableton and Nexus working together. There will be a second pass in the future with more detail and examples. If there are any mistakes, oversights, or suggestions, please reach out to Nexus support staff in our discord server!
Initial Setup
If you would like to use Ableton Live with Nexus, assuming you are using the loopMIDI application as on the getting started page; Open up Ableton Live, select Options from the top navigation bar and select Preferences (Ctrl + ,). Under the Link Tempo MIDI tab of the preferences menu, be sure to check the Track box for your Nexus and Ableton MIDI inputs and outputs. You’ll also want to select Sync and Remote for the Ableton input if you’d like to control the transport functions of Ableton with Atium.
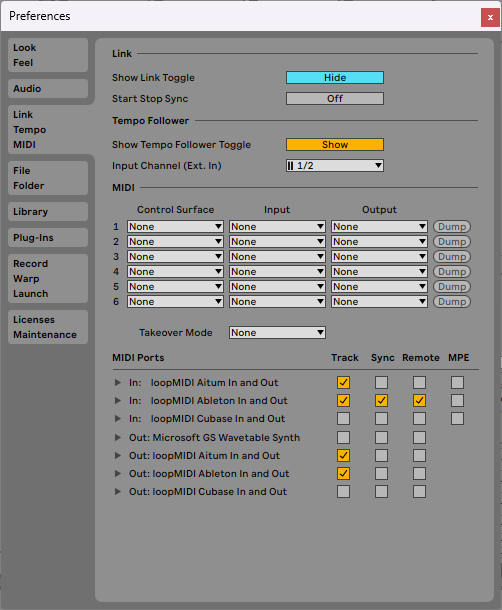
This will give you full MIDI control between Nexus and Ableton Live. Meaning you can both send and receive MIDI to and from Nexus as well as activate the transport controls in Ableton from Nexus as actions!
If you don’t intend to use Nexus to control the transport controls (Play/Pause/Record) of Ableton, you can leave
SyncandRemoteunchecked on the MIDI In port.
Receiving MIDI from Nexus
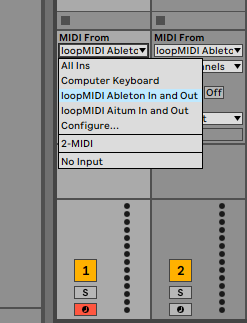
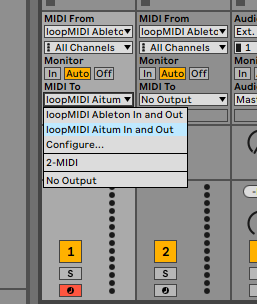
For receiving MIDI from Nexus on a MIDI channel inside Ableton, just create a MIDI track (Ctrl + Shift + T). In the ‘MIDI From’ dropdown menu, select loopMIDI Ableton In and Out (assuming you followed the naming convention suggested in the Windows setup section). You’ll need to arm the track in order to see input from Nexus on the channel.
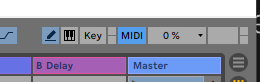
You can also assign MIDI Notes or Control Change messages to nearly any parameter inside Ableton to allow more selective and finite control over Ableton with Nexus. In the upper-right corner of the Ableton press the MIDI Map Mode button.
In this mode, everything that you can bind a MIDI note to will be highlighted in blue. Left-Click the parameter you’d like to control with Nexus, then activate your command that is setup to send MIDI to the ‘loopMIDI Ableton In and Out’ route.
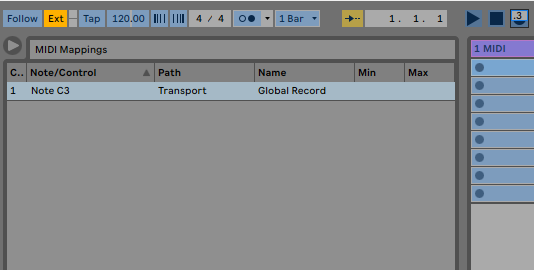
In this example we bound Channel 1 Note 60 to the Global Record button in the transport section of Ableton! If successful, you’ll see the mapping details appear in the left mapping menu and see the MIDI note reflected on the button you’ve mapped.
The MIDI channel values in Nexus are 0-15. Most MIDI software and hardware define MIDI channel values as 1-16. This is true for the channel values of both Notes and Control Changes. This means that setting a channel to 0 in Nexus is equal to 1 in most other devices and software’s. The Nexus team intends to change the values internally to be 1-16 in a future update. (Update timeline TBD)
Start and Stop Ableton with Nexus
Assuming you’ve already turned on the Sync and Remote functions on the loopMIDI Ableton In and Out route as described above.

You’ll need to select the EXT button in the top left of Ableton in order to allow Ableton’s transport functions to be controlled by an external application, Nexus in this instance.

Once you’ve done that, you’ll need to create one command in Nexus for Starting playback in Ableton, and another for Stopping playback.
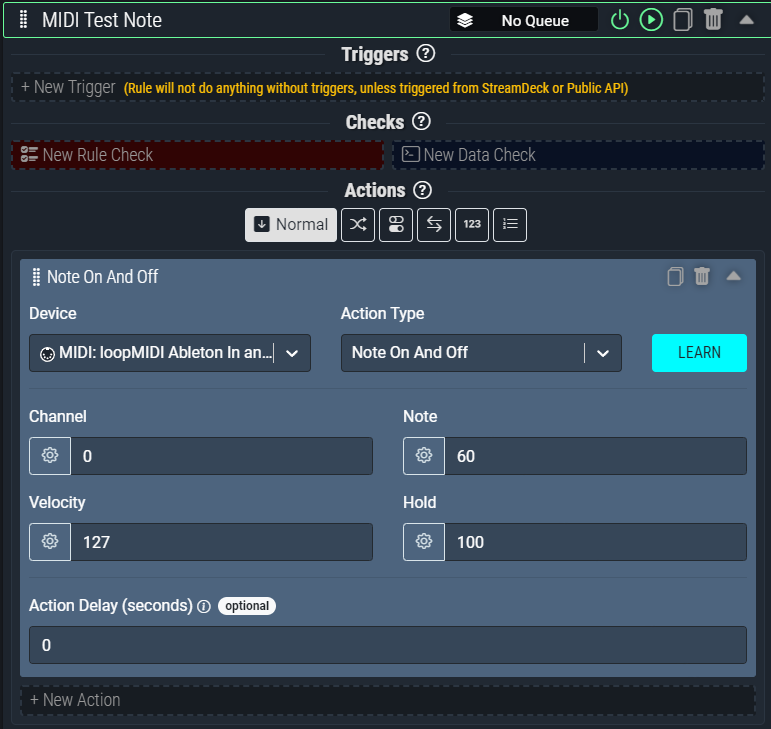
In order to start playback, you’ll need a command with two actions. The first action will be a Start action type. This will set the MIDI clock to the start of the timeline. The second action will be a Clock action type, which will “Start” the clock and begin playback.

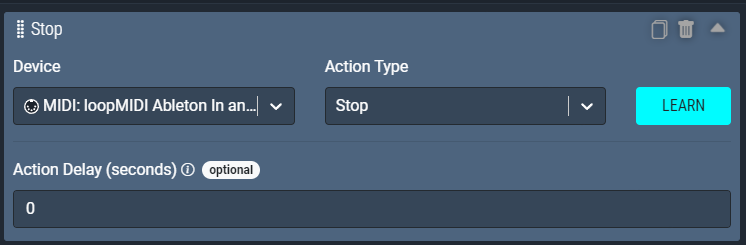
To stop playback in Ableton, simply create an action that sends a Stop MIDI command.
Sending MIDI to Nexus
To receive MIDI from Ableton to use for Triggers within Nexus, you can set the MIDI Out of any MIDI channel strip in Ableton to target the ‘loopMIDI Nexus In and Out’ route we created with loopMIDI.
Any MIDI notes being sent from this channel can now be used within Nexus. The quickest way to grab the MIDI Note being sent from the channel is to use the Learn function within Nexus! Simply choose the ‘loopMIDI Nexus In and Out’ device in a Trigger and click Learn, then play the MIDI note from Ableton and it should populate the trigger with the appropriate MIDI input type and values.