Touch OSC + Nexus
Sending and Receiving MIDI with TouchOSC and Nexus
This is a first draft of a guide to getting TouchOSC and Nexus working together. There will be a second pass in the future with more detail and examples. If there are any mistakes, oversights, or suggestions, please reach out to Nexus support staff in our discord server!
TouchOSC is a very flexible and powerful software that can be used to create modular control surfaces. TouchOSC can be used on Windows, Mac, Linux, iOS and Android. Using MIDI or OSC messages, Nexus and Touch OSC can work together to create useful and highly customized touch screen interfaces to trigger any and all events on your stream. Things like scene changes, lighting changes, activating automations, playing sounds, triggering alerts… the list is only limited by your own creative imagination. If Nexus can do it, TouchOSC can trigger it!
TouchOSC Tutorials
This guide will just scratch the surface of what can be done with Nexus and TouchOSC. Below are a few links that will get you up to speed with TouchOSC basics, and setup to use a phone or tablet as a remote control for TouchOSC on your local network. You can even use a button from a GamePad like an Xbox controller to trigger commands in Nexus if you get creative enough!
Take a look at the links below to familiarize yourself with TouchOSC if you’ve never used it before. This will help you understand the possibilities with TouchOSC and make the rest of this guide a bit easier to understand, though the following Nexus + TouchOSC guide is written to be simple and straight forward even if you are not familiar with TouchOSC.
YouTube Tutorial - TouchOSC 101 - Back to Basics! (Ultimate Guide to TouchOSC)
Official TouchOSC Docs - https://hexler.net/touchosc/manual/introduction
Official TouchOSC MIDI Docs - https://hexler.net/touchosc/manual/getting-started-midi
Initial Setup
There are two approaches to getting MIDI in and out of TouchOSC when connecting to other applications on your computer.
Approach One: Built In Virtual Ports
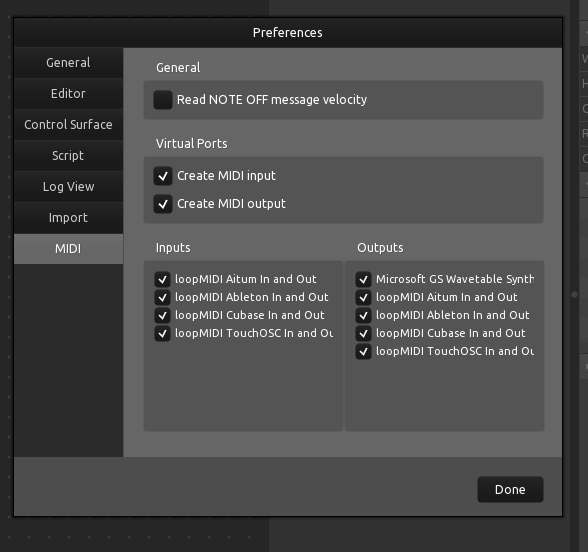
The first and simplest way (available on all operating systems) is to have TouchOSC create a Virtual MIDI Input and Output. In the top navigation select Edit > Preferences > MIDI > Check the box for Create MIDI Input and Create MIDI Output.
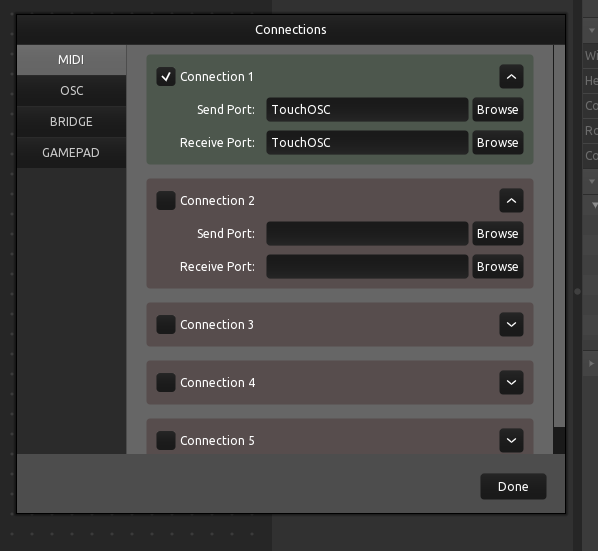
After creating both virtual ports, navigate to the Connections settings. Edit > Connections. Make sure the Connection 1 box is checked and select ‘TouchOSC’ in both the Send Port and Receive Port dropdown menus.
Approach Two: loopMIDI Virtual Ports (Windows)
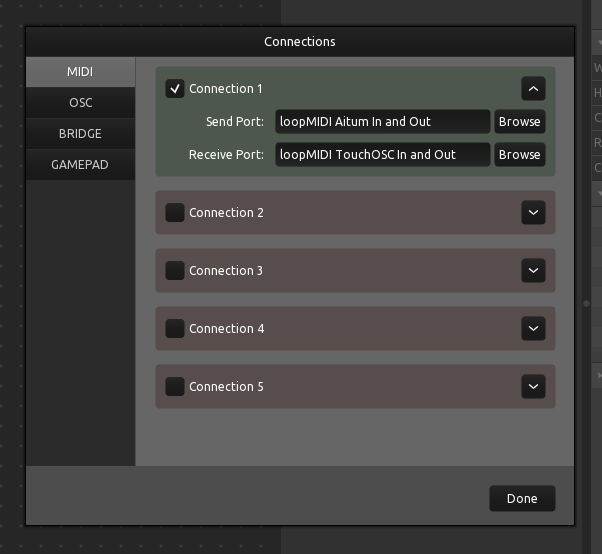
The second way, assuming you’ve already setup ‘virtual MIDI ports’ based on the explanations in the Operating Systems section of the getting started guide, we will start by targeting those routes in TouchOSC. Navigate to Edit > Connections. Make sure the Connection 1 check box is selected. In the drop down menus for Connection 1, select ‘loopMIDI Nexus In and Out’ for the Send Port and ‘loopMIDI TouchOSC In and Out’ ffor the Receive Port. The Connection 1 box should be Green if the connection was successful.
Triggering Nexus Commands
Now that we have established our MIDI connections in TouchOSC, we can create a button to demonstrate how to trigger a command in Nexus!
Creating Our First Button
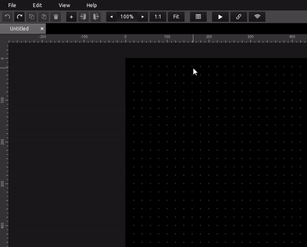
To get started, we will press the + button in the top navigation bar of TouchOSC and select Button. This will create a button on the TouchOSC canvas that we can move around, resize, and assign a MIDI message to send to Nexus!
After creating the button, make sure you select the button (left-click) and scroll to the bottom of the details panel on the right side of TouchOSC. Towards the bottom of the details panel you should see a MIDI menu in the Messages section. Click to expand the MIDI section.
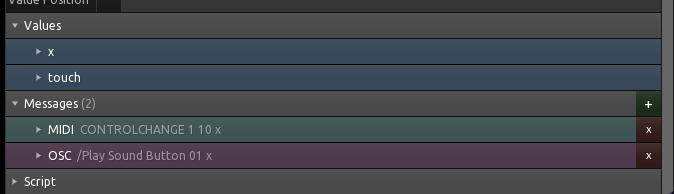
The first thing we need to do is decide the type of MIDI message we want to send with this button. This can be selected in the Type row, the default is Control Change and is the recommended message type for triggering Nexus commands.
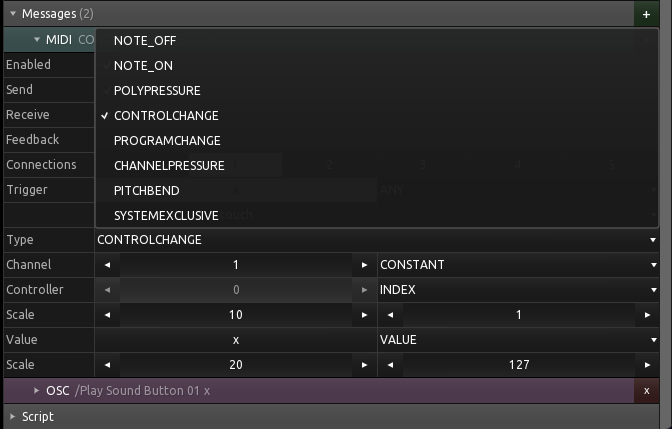
To only send the MIDI message of this button to Connection 1, select 1 in the connections row.
This can be left on the
∞symbol to send the MIDI message of this button to ALL available connections.
Set the Channel, Controller, and Value rows to be a Contant. This allows the button to send a constant value for the control change based on what you set in the Value field.
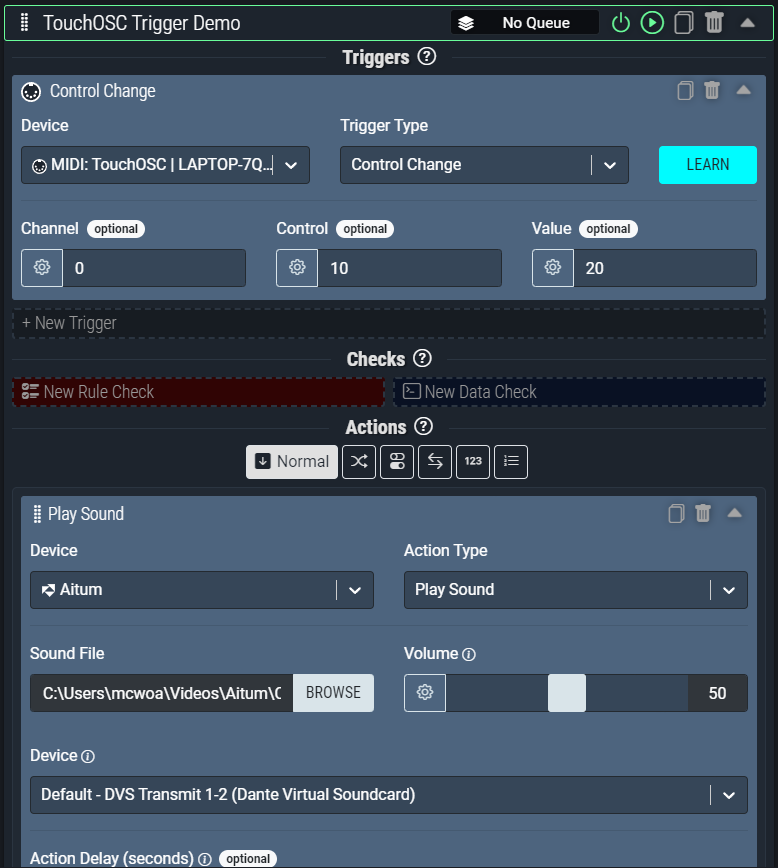
The image below shows a MIDI message with the following values.
Connections: 1
Type: Control Change
Channel: 1
Control: 10
Value: 20

To use this button you can press the Play button in the top navigation bar of TouchOSC, this will put TouchOSC into ‘Show Mode’.
Triggering a Command
After creating our Control Change button in TouchOSC, we will create a new command in Nexus, select the ‘MIDI: TouchOSC’ or ‘MIDI: loopMIDI TouchOSC In and Out’ device depending on your setup.
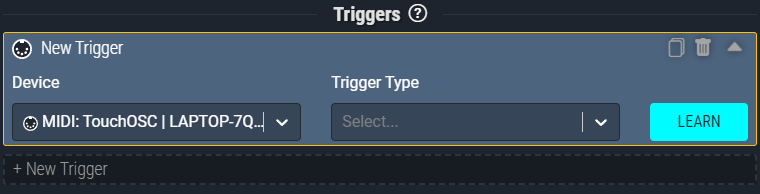
Once selected, press the Learn button in Nexus, then immediately press the Control Change button we created in TouchOSC while in Show Mode. This should automatically assign the matching values of the control change button to the trigger in Nexus.
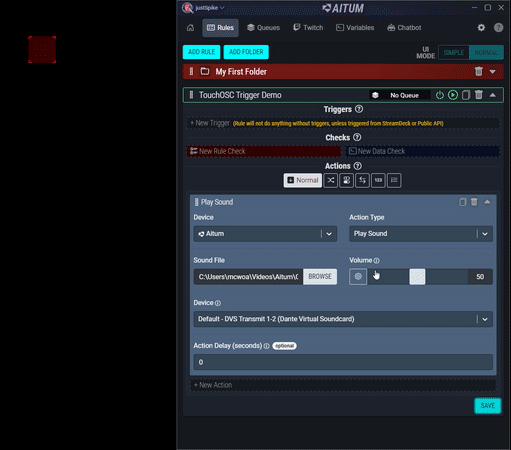
This particular command is setup to play a sound file with the Play Sound action built into Nexus.