OBS Studio
For OBS version 28.0 and higher
Nexus supports integrating with OBS Studio. This allows you to control your OBS instance, including switching scenes, managing sources, and more. You can also use scene switches as triggers to activate commands in Nexus. While there are many forks and derivatives of OBS, we only guarantee support with OBS Studio. If you are using Streamlabs Desktop, we support that separately.
Setup
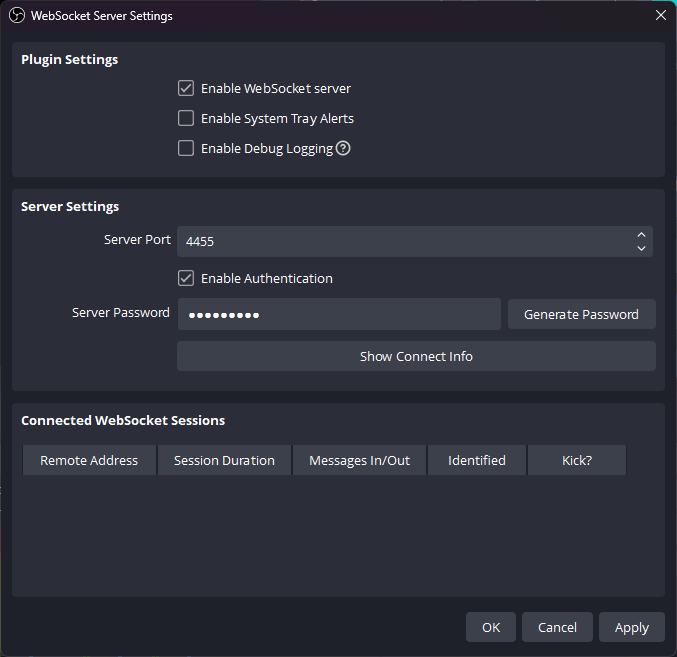
To get started, open OBS and go to Tools → Websocket Server Settings in the toolbar. On this window, you will see the settings for your OBS websocket. Ensure that “Enable WebSocket server” is checked under Plugin Settings, then make a note of the port and optionally enable authentication. The settings you see on this page will be used within Nexus to configure the integration with OBS.
After configuring OBS websocket, open Nexus and then go to the Settings tab. Click on Integrations to access the integrations page. Click New Integration to open the new integration wizard, and then select OBS. Give your integration a unique name that you will remember it by (useful if you have multiple OBS instances!), and then enter the port and the password of your OBS websocket. You only need to enter a password if you checked “Enable Authentication” on the OBS websocket settings.
After you press Save, Nexus will automatically try and connect to your OBS websocket. If the connection failed, you will be informed by an error message on Nexus.
Nexus with automatically connect to OBS if you already have OBS running when launching Nexus. If Nexus is running prior to starting OBS, you will need to recconect by going to the integrations page and pressing the ‘Reconnect’ button on your OBS integration.
Nexus does have a built in function to ‘attempt to recconect’ to your OBS integration if Nexus is NOT connected. This will only happen if a command is executed with an action that targets your OBS integration. When the command is fired, Nexus will attempt to reconnect on its own. If successful, all following OBS actions will work as intended for the rest of the session.
Triggers
- Scene Changed
- Scene Changed From
- Scene Collection Changed
- Stream Starting
- Stream Stopping
- Filter Visibility Changed
- Source Visibility Changed
- Vendor Request Event
- Vertical: Scene Changed
- Vertical: Scene Changed From
Actions
- Change Scene
- Change To Last Scene
- Change Filter Visibility
- Change Scene Filter Visibility
- Change Source Visibility
- Refresh Browser Source
- Set Text Source Properties
- Start/Stop Recording
- Toggle Recording
- Start/Stop Streaming
- Toggle Streaming
- Start/Stop Replay Buffer
- Toggle Replay Buffer
- Save Replay Buffer
- Mute Audio
- Media Source: Play/Pause
- Media Source: Restart
- Media Source: Stop
- Media Source: Next
- Media Source: Previous
- Open Projector
- Broadcast Custom Message
- Set Browser Source Properties
- Set Display Source Properties
- Change Source Filter Settings
- Change Scene Filter Settings
Send Vendor Request - In Progress
- Screenshot
- Vertical: Change Scene
- Vertical: Start/Stop Streaming
- Vertical: Toggle Streaming
- Vertical: Start/Stop Recording
- Vertical: Toggle Recording
- Vertical: Start/Stop Backtrack
- Vertical: Toggle Backtrack