Commands: Introduction
The main meat of Nexus. Find out how commands work, and how to use them.
Commands are the core element of Nexus’s functionality. They can be seen as a set of instructions that tells Nexus - “If X happens, then do Y”. This allows fine control over a number of different elements of your stream setup, because you can mix-and-match any trigger with any action. If you’d like to play a sound, or change an OBS scene when someone redeems a channel redemption on Twitch, you can create a command for that.
You can create as many commands as you like in Nexus, and put as many triggers and actions in them as you like.
Creating A Command
To create a command, go to the Commands page and click the Add Command button at the top.
💡 Commands will glow when they have been triggered! This helps you know when a Trigger has activated a command. You can also test the actions of you’re commands by clicking the Test Actions button on the command as seen below!

What does a command consist of?
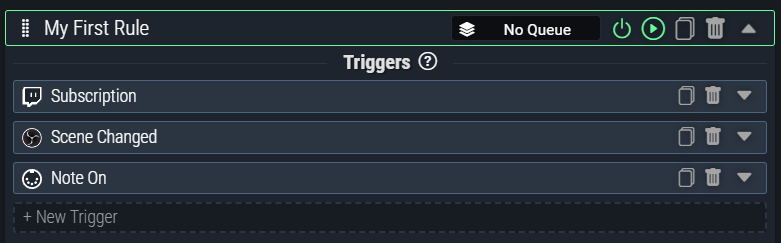
Commands consist of three main parts: triggers, checks, and actions.
Triggers determine whether the command is processed or not. These are things like having a new subscriber on Twitch, changing your scene on OBS, or pressing a button on your MIDI keyboard. You can learn more about triggers in detail on this page.
Checks allow you to decide whether to continue execution of a command, or fetch additional data for use in your command. Checks are a powerful part of using Nexus, but not every command will require them. You can learn more about checks in detail on this page.
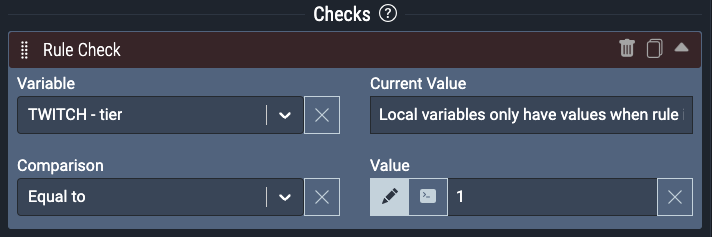
This Command Check will check the Subscription Tier of the subscription that triggered the command. If it is equal to Tier 1, the Command will execute the actions! If it is not, the actions will not execute.
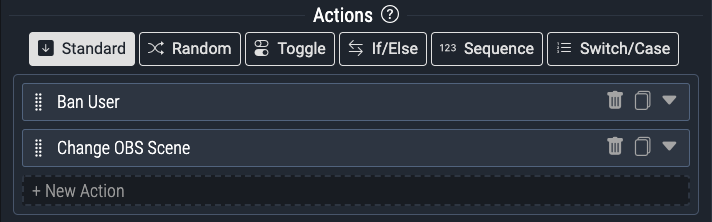
Actions are triggered when the command executes. This can be something like playing a sound through Nexus, banning a user on Twitch, or even changing a scene in OBS. The possibilities are truly endless, and there are a ton of different actions you can choose from depending on the level of interactivity you want. You can learn more about actions in detail on this page.
Managing a command
When you create a command, it is added to the vertical list on the page alongside all of your other commands. The command will be expanded when you first create it, but you can toggle it to be collapsed by clicking the arrow on the right side of the command.
Unsaved commands look like this:

You should note that when the border of the command is yellow, it indicates that the command is currently invalid. You should check your triggers, checks, and actions to ensure that your command is valid before saving. This is usually due to a field that is required not being filled out. The border will become green once the command is valid.

Commands have several interactive elements as defined below. (from left to right)
Drag Handle - Use this to reorder commands and/or move them into or out of Command Folders.
Command Name - Left click on the command name to edit the name. All of the commands in Nexus must have a unique name.
Queue Selector - Click on the queue selector to assign a command to a specific Queue.
Enable/Disable Command - Click here to enable or disable a command. Disabled commands will appear with a Red border. This can also be automated in commands using the Enable/Disable Command Action
Test Actions - Press the Test Actions button to test the actions of a command.
Duplicate Command - Click here to easily duplicate a Command.
Delete Command - Click here to permanently delete a Command. A confirmation box will pop up to confirm deletion.
View Details Toggle - Click the arrow far right to open or close the details of a command.
Command Folders
Commands can be placed into folders by using the Drag Handle on the left side of each command and dragging them into a folder. You can create a new folder by clicking the Add Folder button at the top of the command page. Folders simply allow you to organize commands better, and commands in folders do not behave differently to a command outside of a folder.
Command folders can be Enabled and Disabled. When a folder is disabled, none of the commands inside of it will be prevented from executing. Changing this on a folder level does not touch the enabled/disabled settings of individual commands. So when you disable a command, then disable the folder it’s inside of, and re-enable the folder, the command will still be disabled. Enabling and disabling folders can be automated in commands using the Enable/Disable Command Folder Action
Like Commands, you can modify the name of the folder and re-arrange it. You can also click the icon on the left side of the folder to change the colour of the folder.